
Guides
Pick a category, then open a guide. Everything here is written by the guild, for the guild.
▶ Beginner tips — what actually matters first Getting Started
The priorities for a new player: the Energy Core, shipyards, damage types, components, heroes, and where to find food and resources.
1) Focus on the Energy Core, 5 by 5
Go five levels at a time: consolidate every five levels, gather your resources, then head straight for the next step. Five levels is a milestone, because that is what opens up the new shipyards.
2) Keep producing shipyards
Never stop producing shipyards. It prepares you for war and it raises your total power.
3) Optimise your roster by damage type
- a) Gram — Kinetic: three kinetic heroes.
- b) Opportunity — Beam: three beam heroes.
- c) Alien vessel — Ion: three ion champions.
4) Don't neglect your ship's components
Common and rare components go to 15 at most. Epic ones can go to 30, but they are expensive, so don't level them too much. Legendary components can be taken all the way with the right ingredients. It's your flagship's core that decides the damage type, and three components of the same type and rarity as the core give you a bonus — a huge one in legendary.
Always keep your “choice” legendary flagship components, so you can see when you have enough stacked up to finish a piece.
5) Heroes — spend on ship skills, not battle skills
Put your points into ship skills rather than battle skills, except for the three battle champions. The order is Zola (AoE) > Jodie (AoE) > Phade (attack buff), then Kama / Riaan / Lani depending on your shard luck. With good movement, a high-damage champion clears most of Radiant.
6) Port raid
Take the guild reinforcement package — +40% damage in the battle raid event. Wait until the captain has been weakened by Foxy before you cast it.
Getting plenty of food
- 1) Operation Blackout.
- 2) Radiant.
- 3) Strikeback.
- 4) Killing 10 tribute vessels — you have to start the rally yourself.
- 5) Never stop grinding Ascendancy minions.
Three more important tips for every resource
- 1) The guild shop — food, speed-ups, resources and AP potions.
- 2) The discount shop — it costs credits.
- 3) Non-stop trade shipping, mostly gold, because gold is the hard bottleneck for levelling your flagship.
▶ How to farm Prismatic Cores easily Economy & research
A level 1 Sacred Tribute gives the same 24 prismatic cores as a level 10 — so farm the low ones: easier rallies, more Sacreds, same cores.
The weekly bonus
Each week you get 3 bonus chests for farming Sacred Tributes. At level 10 you get 24 prismatic cores from the fight, plus a bonus chest with 24 more.
Important: do those first 3 Sacred Tributes at the highest level you can — level 10 in this case. Only once those 3 jobs are done should you drop to lower levels.
Once you have taken those first 3 bonus rewards, you are done for the week as far as the bonus goes.
Why low-level Sacreds are better
Killing a level 10 or a level 1 Sacred Tribute gives the same amount of prismatic cores: 24. So it is easier to farm Sacreds in lower-level regions with your 3 ships, where you get a lower-level Sacred Tribute.
A lower-level Sacred Tribute is easier to rally: after a certain point in the game you may be able to do it alone, or with just 2 or 3 people, instead of the 7 or 8 you need for a level 10.
The other rewards are smaller than on a level 10, but you rack up Sacreds far faster.
Bonus tip for events
Every Sacred Tribute you generate is placed on your trader network board. When it dies — killed by you or by anyone else — you get a red dot saying the job is done.
Don't claim it. Save it for an event where these trader jobs give points.
These Sacreds don't have the 18h limit the other jobs have; they just stay there until you clear them. You can arrive at event day with a full Sacred board.
▶ 100 Traders — event program Combat & events
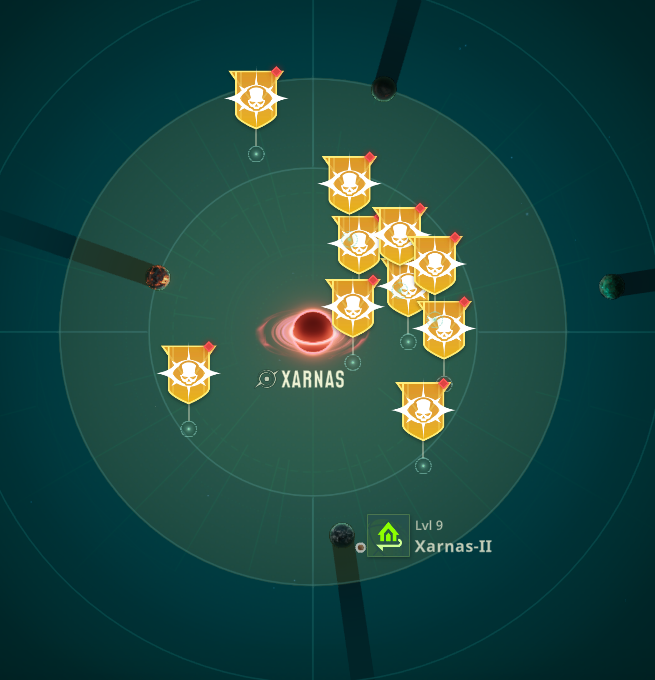
Yo — very important information. At 00:00 UTC the important event, 100 Traders, starts.
The goal is to farm Gram parts in order to upgrade your flagship. Some rules are really important.
This is a 7-day event. You have four levels of reward, but to be honest, focus only on the third one — the fourth costs too much to be worth it.
The event is an individual ranking, but a guild ranking too. You earn points depending on the focus of the day.
The program
Day 1 — Building
Use your building and ship speed-ups like a maniac. You can buy packs too. Each of your actions earns points.
Day 2 — Heroes
Use all of your Venturous, because they don't count on day 5. Promote champions and increase their abilities and their levels to earn points.
Day 3 — Crew
Use your beacons and enhance your Nexus as much as you can, make map searches if you can, and use tech speed-ups.
Day 4 — Flagship
Upgrade the level of your starship, install new components, improve them or use blueprints, and you will win points.
Day 5 — War preparation
All the rules of the last four days are allowed on this day, except some — like using Venturous to summon champions — so don't waste them on this day.
Day 6 — Deathmatch PVP
You can fight other players or collect orbs from the hunting zones (Kanvo, Kruger, Cerno and Sphinx). If you fight in a level 4 system you get 100% glory, otherwise 50%.
▶ Energy Core — plan the critical path Economy & research
When we talk about the Energy Core you always have requirements: the main cannon and another building. You have to take their costs into account when you plan your next move.
So, how do you use your resources consistently and focus only on the critical path to improve your Energy Core? The master word is planning, of course.
You should know at all times how to use your time and your resources in order to reach the next level of the Energy Core.
The checklist
- Check the requirements of your Energy Core's next level by clicking on Upgrade and looking at them. It will always be the cannon and another building.
- Check the requirements of the main cannon — it will always be another building (often the guild office, research or repair cabin).
- Check the amount of resources needed for both buildings and for the Energy Core.
- Check your current amount of resources and compare.
- If you're short, don't worry: you have time before you reach the Energy Core requirement, so you have time to gather resources.
Timing with events
Aligning upgrade timing with event cycles multiplies returns. Mothership Power Rush and development events: save speed-ups and large resource builds for the Mothership Power Rush or Top 100 GvG events. Upgrading your Core during these events earns back massive rewards.
It's like a chess game: you have to know the requirements in advance so you can anticipate the buildings you have to upgrade before they are required.
Rules
- Use speed-ups only for the Core level path.
- Try to synchronise your Core production with day 1 or day 5. The best is to unlock your Core on day 1 and, if it is level 25, produce factories without speed-ups (days 2, 3 and 4), then use your shipbuilding speed-ups massively to produce T5. You have to take into account the cost of T5 production by promoting T4 — include that in your planning and your calculations.
- You have to be Core-oriented at all times. The other buildings are not useless, but T5 (level 25) and then T6 (level 30) are a big game changer when you have them before the others.
- Do not miss events like Arms Race and Def Trading.
Cheers.
▶ Research & resources — economy first Economy & research
VERY IMPORTANT about research: finish the economic tree first, before going for war and flagship.
It will greatly increase your resource sustain (Cargo Hold & Garden, smelter and water) and your building speed. The sustain from this tree is your best asset for having enough resources to grow steadily.
The rules
- 1) Never use speed-ups, champion stuff (levelling up Venturous or manual), flagship prismatic core or component upgrades, beacons, Nexus enhancement or computational components outside a specific event.
- 2) Never use more speed-ups or resources than necessary outside the Core levelling.
- 3) If your Core upgrade is already running, try to increase your resources (garden, smelter, water production, or DPS stuff like turrets and Cargo Hold).
- 4) Reaching the third chest is enough in 100 Traders — don't aim for the fourth. Try the same on PVP day (15 blueprints).
- 5) Hold your resources back during 100 Traders and let off steam in the Guild Duel.
- 6) Research matters a lot for the Guild Duel, so use plenty of it during the crew/technology day, even during 100 Traders — the higher you go, the more points you'll score.
- 7) Try to have 60 or 70 AP potions before the Blackout operation (buy them in the guild shop / glory shop).
- 8) Try to have a lot of repair modules before PVP — best is to set auto-join when you're full, then produce extra modules.
▶ Resource management — reaching a level 25 Energy Core Economy & research
A simple way to think about your resources and the critical path, so you reach the level 25 Core and the T5 shipyard as fast as possible.
Types of resources
Not visible in your resource stats:
- 1) Purple chest — the amount depends on your Core level. Use these only when you have no other choice and they are blocking a construction or research.
- 2) Grey chest — the resource can be iron or water. Some are 10K, others 100K, and some 1M.
- 3) Food chest — the amount is random, and invisible in Storage › Stats.
Visible in your resource stats:
- 4) Raw resources — water, iron, gold and food. These are the only ones you can actually see in Storage › Stats.
So what is resource management?
It is the ability to know roughly how many resources you have available. Most of them are not visible in your stats, so you have to estimate them. That matters, because it is how you know what you need and how to reach your next objective. The goal is simple: never run out of resources at the critical moment, when you cannot build because of it. For example, I know exactly how many resources I have before planning my next step.
Ways to get more resources
- 1) Trade shipping — always look for the resources you need to build the Energy Core. Usually iron and water.
- 2) Shops — Glory shop, Guild shop and the discount shop (always look for 40% or 50% off, and refresh twice). They often offer resources, and you have to take them when you can see you will be short soon.
- 3) Events — Arms Race gives a lot of resources, and depending on your ranking you will always win some.
- 4) Never miss your network commission and ruins — that is a lot of resources. For ruins, look for Legendary, or at least Epic with plenty of iron or water.
- 5) Never miss your tribute vessel — 10 per day, plus rallies from others (50 rewards).
- 6) The port — in the guild you can claim your reward from the ports we own.
- 7) For those who pay — the weekly card, which gives resources.
Planning the critical path
The main point is knowing how many resources you have and putting that against your next building goal — usually the Energy Core. And with the Energy Core there are always requirements: the main cannon and another building. You have to take their costs into account when you plan your next move.
So how do you use your resources consistently and focus only on the critical path to improve your Energy Core? The key word is planning, of course. You should know at all times how to use your time and your resources in order to reach the next Energy Core level.
- 1) Check the requirements of your Energy Core's next level by clicking Upgrade and looking at them. It will always be the cannon and another building.
- 2) Check the requirements of the main cannon — it will always be another building (often the guild office, research or repair cabin).
- 3) Check the amount of resources needed for both buildings and for the Energy Core.
- 4) Check your current amount of resources and compare.
- 5) If you are short, do not worry: you have time before you reach the Energy Core requirement, so you have time to gather resources.
Timing with events
Aligning upgrade timing with event cycles multiplies returns. Mothership Power Rush and development events: save speed-ups and large resource builds for the Mothership Power Rush or Top 100 GvG events. Upgrading your Core during these events earns back massive crate rewards, speed-ups and Credits.
It is like a chess game: you have to know the requirements in advance so you can anticipate which buildings you need to upgrade before they are required.
Rules
- 1) Do not spend speed-ups on useless things — only on the path to the Core level.
- 2) Try to synchronise your Core production with day 1 or day 5. The best is to unlock your Core on day 1 and, if it is level 25, produce factories without speed-ups (days 2, 3 and 4), then use your shipbuilding speed-ups massively to produce T5. CAREFUL: you have to take into account the cost of T5 production by promoting T4 — include that in your planning and your calculations.
- 3) You have to be Core-oriented at all times. The other buildings are not useless, but T5 (level 25) and then T6 (level 30) are a big game changer when you have them before the others.
- 4) Try to take part in every event and you will earn resources to sustain your development.
- 5) Do not waste time and resources on other buildings until level 25.
The critical path includes only Energy-Core-dependent buildings, like the main cannon. Focus on those in particular if you want to catch up — even if you are behind, you can catch up quickly.
In practical terms it is simple: when you are ready to build your next Core, check the requirements for the main cannon and start production in the corresponding room. In general it will always be the same things — factories as the requirement for the Core, and guild office, research and repair cabin for the main cannon.
For those who can pay, some investments are worth it
- 1) The 2nd builder, obviously — €5.99
- 2) Black Card membership (5 ruins, 4 ascendancy, 2nd search line, 1 free discount market per week) — €11.99/month
- 3) Weekly card — 2M, then 2M per day, and 5 purple chests — €5.99/week
▶ Advanced tips — component upgrades Fleet & ships
Let's talk about legendary components and how to get to them quickly.
The three types of box
- 1) Random legendary blueprint or component
- 2) Selected legendary blueprint
- 3) Selected legendary component
1) Random legendary blueprint or component
You find these in many events (Ascendancy 170, for example), as a reward for capturing a star, in the valor shop, or in a mythic ruin. There is no strategy — you open it, it is pure RNG.
2) Selected legendary blueprint
Pretty rare, so you should never use one without thinking about the result. Use them strategically: only when you reach 8/9, or when you need one legendary item to complete 3 or 5 items of a damage type. Always focus on Gram first.
Never use them randomly — they are rare and valuable. Stack them until an event, and then use them when you are chasing a specific component. For example, sometimes you never touch a cannon, so use one to get your cannon.
3) Selected legendary component
Nothing more to say, except: choose strategically, depending on what you are looking for. Always aim to finish your legendary items on Gram before the others — with 5 Gram components you get a huge boost.
Breakthrough
Nothing more to say either, it is the same as with epic items: you need the same item to break through, which gives you 10 more levels and a big stats boost. Obviously, upgrade the level of your items as soon as you can. Always prioritise Gram, and kinetic.
Empower
Empower is based on the prismatic core. The higher the empower level, the lower your chances of success. So try to empower every item to a low level first — that is the best return on investment. This currency is really rare and you should focus hard on not wasting it on useless things.
Two very important rules: always prioritise Gram, and empower all items to the same level. When you have 5 items empowered at a given level you gain a "resonance", a passive boost that is really useful.
In summary
- 1) Hold back your selected legendary blueprints.
- 2) Prioritise Gram (kinetic) only.
- 3) Empower Gram (kinetic) first.
▶ Arena — line-ups and valor Combat & events
The arena is important. The more highly-ranked players you have, the more points you earn for the guild ranking.
A few simple rules.
1) Defensive line-up
In your defensive line-up, place your ships in this order:
- Beam
- Ion
- Gram
Why? Because most people, when they build their line-up, just click one after another: first Gram (generally kinetic), second Opportunity (Beam), third Demarzel (Ion). We use the natural counter to increase your damage.
2) Positioning — you can drag your ships
You can drag a vessel to another position. So make sure you never put the Gram — your main source of DPS — in the middle, whatever the situation. If you have an Ion, put the Ion there; otherwise put the opposite damage source.
The best position is the Beam in the centre, the Ion to its right or left depending on the line-up, and your Gram at the far right or far left depending on which side the Ion is on. Always keep the Gram next to the Ion or the Beam.
3) The automatic fight
The first fight is 3 vessels against the vessel in the middle, so protect your Gram by putting it on a side. If the enemy does not put their Gram in the middle, your goal is to focus their Gram second, with both of your side vessels, right from the start.
Depending on the line-up you are up against, that can be hard, but that is the goal.
4) Use all your attempts
Always use your 3 chances, and 2 extra if you can, to reach 50 valor per day and have a chance to reach the top of the ladder faster.
5) Composition
KEY POINT: your team has to synergise correctly for each vessel. Here we go:
- Slot 1 — Tank
- Slot 2 — Hybrid utility / debuff
- Slot 3 — Main nuke carry
For example, for Gram it's Cocoon / Eva / Zola, or if you don't have Zola, Riaan or Lani.
For the Opportunity it's Aliya / Doug / Lucius or Evan, or Doug / Klara / Lucius.
For Demarzel: Lily / Phade or Kama depending / Jodie, or Phade / Kama / Jodie.
6) The fight
Many people intentionally change the damage type of their flagship to confuse people. To get a clear idea of the type of damage a ship can inflict before entering combat, look at the icon above the ships when you click on the character's image.
Your aim is always to follow the synergy. In slot 1, place the ship that counters it — for example Gram Beam — in the centre; then place your Ion; next, Demarzel Kinetic; then place your Beam; and finally, Opportunity Ion; place your Kinetic.
With this simple advice you will be able to fight and win far more valor arena fights.
▶ Arena — advanced positioning: targeting the enemy Gram Combat & events
Once you know the basics, use these rules to work out exactly where to drag your ships so both of your side vessels attack the enemy's Gram first.
A few extra rules once you already understand the basics.
1) The middle vessel gets focused first
At the start of the fight, the vessel placed in the middle is always attacked by all three of your vessels.
2) Never put your Gram in the middle
Never put your kinetic ship (Gram) in the middle — it's your main source of damage, and the middle slot takes the most punishment.
3) Put your Beam or Ion in slot 1
Position 1 should always be your Beam or your Ion, never your Gram.
4) Always check where the enemy's Gram is
The enemy's Gram is your main target. If it is in the middle, that fight is an easy win.
5) Enemy Gram on the left
If the enemy's Gram is on their left, put your Ion or Beam in position 3 (facing their Gram), then drag your Gram into position 6.
6) Enemy Gram on the right
If the enemy's Gram is on their right, put your Ion or Beam in position 2, and your Gram in position 4.
7) Enemy Gram behind the centre
If the enemy's Gram is behind their centre vessel, it depends on where their last remaining vessel is: if that vessel is on the left, their Gram will end up facing your right side, and vice versa.
Doing this lines up both of your side vessels to attack the opponent's Gram, giving you a much better chance to win the duel.
Of course, if you're significantly weaker than your opponent this won't guarantee a win — but it will help you win more fights than before.
▶ Dominion Warzone — event guide Combat & events
A 6-day server-vs-server event. Understand the scoring themes, Battle Day timing, and the first-garrison rule before it starts.
A 6-day server-vs-server event. Five days of scoring decide who attacks on day 6 — the server with more points becomes the Attacker, the other becomes the Defender. The ultimate goal is to control the enemy's Ascendancy Fortress.
Event structure
- Days 1–5 — Preparation: each day has a different scoring theme. Individual points plus server points add up — the total decides who attacks on day 6.
- Saturday 00:05–14:00 UTC — Scouting phase: attackers can start jumping into the enemy server, but only to scout. Don't engage yet.
- Saturday 14:00–18:00 UTC — Main Contest: the decisive 4-hour window for Garrison Strongholds and the Ascendancy Fortress.
- 18:00 UTC — Result: if the Attacker reached 100% Fortress occupation, they win; otherwise the Defender wins.
- After Battle Day — Recovery: 30% of combat losses and speedups spent are returned, but must be claimed manually within 3 days.
The 5 preparation themes
- 1. Development First — combat against Ascendancy Minions and Tribute Vessels
- 2. Talent Recruitment — champion fragments, weapon prisms, training manuals
- 3. Technology & Crew — technology speedups, Deep Space items, Ruin excavation
- 4. Ultimate Flagship — flagship upgrades, Prismatic Cores
- 5. Pending — the 5th theme varies; confirm in-game once it opens on your server
Golden rule: each resource only scores points on its matching theme day. A Legendary Weapon Fragment spent outside Stage 2 is worth 0 points — spent on the right day it's worth thousands. Tell the guild to stop spending these premium resources a week before and save them for the right stage.
Attacker vs Defender
- Attacker — jumps into the enemy server through Expedition Jump Points (needs Energy Core level 15+), each jump has a 30-minute cooldown. Wins by reaching 100% Fortress occupation before 18:00 UTC.
- Defender — cannot enter the enemy server. Wins simply by preventing the Attacker from reaching 100% before the deadline.
The rule most people miss: first garrison
The first player to garrison a key building sets the maximum rally capacity for that building for everyone else, for the rest of the event. If a weak player garrisons first by accident, every rally from that building gets capped at their strength. Assign in advance who garrisons first at each Stronghold and the Fortress — never leave it to chance.
Practical tips for the guild
- Tell the guild now not to spend Legendary Weapon Fragments, Weapon Energy Cores, Venturous Memories, Technology Speedups, Echoes of Deep Space, Flagship Blueprints or Prismatic Cores — save them for the matching stage.
- Decide in advance who will be the "first garrison" at each key building on Battle Day.
- Confirm who has Energy Core level 15+ — only they can jump to the enemy server as Attackers.
Note: Dominion Warzone is still being adjusted by the developers — exact point values and thresholds may change between patches. Verify them in-game once the event opens on your server.
▶ Robots event — highest score strategy Combat & events
A solo event with huge rewards. Here is the optimized hero lineup and energy cube routine for the best possible score.
The Robots event is a solo event that gives you tons of rewards. Here is the most optimized strategy to get the highest score.
Aim for the best run possible
- Use Zora, Jodie and Lilly to maximize your damage output. Tip: use manual skill mode so Lilly can hit two waves of robots with the same ability.
- The robots drop energy cubes on the ground. Do NOT use any of them until there are only 40 robots left. (Restart if this happens.)
- Don't stack two energy cubes on top of each other. (Restart if this happens.)
- Save up as many energy cubes as possible on the ground before there are only 40 robots left. No more cubes drop at the end, so if you run out you will waste time. (Restart if you feel you don't have many.)
Keep in mind that once there are 40 robots left, you will have enough energy to use one cube per wave.
Credit: this guide was written by ๖ۣۜNσvα.
▶ Treasure Hunt — filling the Treasury fast Economy & research
The in-game wording about the Treasury is misleading. Here's what actually fills it, and the daily routine to speed it up.
A quick guide to help you fill your Treasury as fast as possible. If you read the in-game wording carefully, it's a bit tricky to understand — after some digging, thanks to Cerberus and Ulquiora, we've got the full story.
How the Treasury actually fills
The game describes the Treasury as gradually filling up, said to depend on trade in the region. In reality, it's simpler than that: the more Network Commission missions you complete, the faster the Treasury fills. A Treasury that fills quickly means very happy subjects and a prosperous kingdom.
The daily routine
- Every day, ask your members to complete their Network Commission missions in S9 — but don't confirm/claim them yet.
- Change your Home Port to the region where your Overlord's headquarters is located.
- Confirm the missions now — this is what raises the Treasury level, with no penalty for having completed the missions elsewhere.
- Return to your original Home Port in S9 whenever it's convenient — there's no rush.
Credit: this mechanic was figured out by Cerberus and Ulquiora — thanks for sharing it with the guild. Feedback is welcome if anything here needs correcting.
▶ Heroes — basics, upgrades and best teams Fleet & ships
Everything about Heroes: rarities, Elements and roles, how to upgrade them, and the best team for Ground Combat and each Flagship type.
🦸 Heroes are your main allies on the battlefield, whether in 🚀 Space Combat or 🌍 Ground Combat. There are several ways to upgrade them and unlock their full potential, turning them into a true terror of the galaxy! 💥
🔎 Overview
Heroes come in two rarities:
- 💜 Epic
- 🌟 Legendary
Needless to say, Legendary Heroes are rarer than Epic Heroes and generally have better stats and stronger abilities. 💪
⚛️ Element and role
Each Hero is affiliated with an Element:
- 🟠 Kinetic
- 🔵 Beam
- 🟣 Ion
You can check a Hero's Element by opening their profile, going to the Information tab, and looking in the top-left corner of the screen.
Each Hero also has a specific role on the battlefield:
- ⚔️ Attack
- 💚 Healing
- 🤝 Support
- 🛡️ Defense
Later in this guide, we explain how to use Heroes and their roles depending on the event. 👇
⬆️ How to upgrade Heroes
There are several ways to upgrade your Heroes:
- 🍖 Increase their overall Level — by using Supplies, you can increase your Heroes' levels. A Hero's maximum level depends on the level of your Energy Core.
- 📚 Increase their Ability Level — by using Training Manuals of the same rarity as the Hero, you can upgrade their abilities.
- ⭐ Increase their Star Level — when recruiting Heroes, you can obtain Star Fragments that can be used to increase a Hero's Star Level.
You can also obtain Universal Fragments, which can be used on any Hero of the same rarity.
⚠️ However, some Heroes, such as Lily, cannot have their Star Level increased using Universal Fragments.
💡 You will quickly realize that you cannot upgrade all of your Heroes equally. You will therefore need to make choices based on how you plan to use them!
🌍 Ground Combat — how to use Heroes
In Ground Combat, your team composition depends on the type of battle you are taking part in.
- 🗺️ Map Exploration — a balanced setup: 🛡️ 1 Defense Hero / ⚔️ 1 Attack Hero / 🤝 1 Support or Healing Hero.
- ☢️ Radiation Combat — works the same way as Exploration battles.
- ⚓ Harbor Raid — bosses deal very little damage, so prioritize ⚔️ 3 Attack Heroes or ⚔️ 2 Attack Heroes + 🤝 1 Support Hero. ✨ Phade is an excellent choice here thanks to his ability to increase his allies' damage.
- 🤖💥 Kaboom! Robots Event — once again, enemies do not fight back, so prioritize ⚔️ 3 Attack Heroes or ⚔️ 2 Attack Heroes + 🤝 1 Support Hero.
💬 Personally, I am not a big fan of Healing Heroes. I find their effectiveness somewhat limited, but this is a personal preference.
💡 When enemies cannot retaliate, there is usually no need to bring a Defense or Healing Hero. Focus on maximizing your damage! 🔥
🚀 Space Combat basics — how to use Heroes
Now we are getting to the heart of the matter! 🔥 First of all, every Flagship has an Element, which is determined by its Core Equipment. ⚛️
If you use 3 Heroes with the same Element as your Flagship, you increase the following stats of every ship assigned to that Flagship by:
- 📈 +20% Attack
- 🛡️ +20% Defense
- 🧠 +20% Intelligence
💥 This bonus is absolutely HUGE!
💡 Finding the best Hero teams
The game provides a useful recommendation tool.
- 1️⃣ Click the "Fleet" icon while in Space View.
- 2️⃣ For each ship, you will see a yellow icon labeled "Reco."
- 3️⃣ Depending on the Heroes you own, you can use the Heroes recommended by the game.
⚠️ The recommendations are a useful starting point, but the best team will always depend on the Heroes you have upgraded and the type of content you are playing.
🟠 Best Kinetic combos
For the vast majority of battles, including PvP:
- 🛡️ Cocoon (🌟 Legendary / Defense)
- ⚔️ Eva Von Trier (🌟 Legendary) OR ⚔️ Riian Dessos (💜 Epic)
- ⚔️ Zora Domini (🌟 Legendary) OR ⚔️ Lani Veritas (💜 Epic)
🔥 This is currently one of the strongest Kinetic lineups for general content and PvP.
💤 For Calamity, Trade Route Defense, and similar events where enemies do not attack: you can replace your 🛡️ Defense Hero with an additional ⚔️ Attack Hero — for example, ⚔️ Lani Veritas.
💡 If the enemy cannot deal meaningful damage to you, maximizing your offensive power is generally the best choice!
🟣 Best Ion combos
🚀 Basic lineup:
- 🤝 Phade — 💜 Epic / Support
- ⚔️ Jodie Béart — 🌟 Legendary / Attack
- ⚔️ Kama Moaï — 💜 Epic / Attack
🔮 Upcoming Heroes
The following Heroes have not been released yet:
- 🌟 Ajita — Legendary / Support ➡️ replaces Phade
- 🌟 Lily — Legendary / Attack ➡️ replaces Kama Moaï
💡 Once they become available, these Heroes are expected to significantly improve the Ion lineup. ⚡
🔵 Best Beam combos
🚀 Basic lineup:
- 💚 Doug Rockwell — 🌟 Legendary / Healing
- 💚 Klara — 💜 Epic / Healing
- ⚔️ Lucius Pullo — 💜 Epic / Attack
⚠️ The Beam Element is potentially the most expensive one when it comes to building a strong Hero team.
🌟 Alternative and premium Heroes
- 🤝 Aliya — 🌟 Legendary / Support ➡️ replaces Klara
- ⚔️ Evan Rogers — 🌟 Legendary / Attack ➡️ replaces Lucius Pullo
🔥 Evan Rogers is only available during limited Recruitment events and is an extremely powerful Hero.
🔄 Final notes
More Heroes will probably be released in the future. 🚀 As the game evolves and new Heroes become available, this guide and the recommended lineups will be updated accordingly. 📈
💡 Remember: the best Hero team is not always the same for every event. It may be better to use a well-upgraded Epic Hero than a poorly upgraded Legendary one. Always adapt your lineup to:
- ⚛️ Your Flagship's Element
- ⭐ The Heroes you have upgraded
- ⚔️ The type of battle
- 🛡️ Whether enemies attack or retaliate
🎮 Have fun, Commanders! Good luck out there, and see you on the battlefield! 🚀🌌💥